

Building on a Budget (with Khagra’s Ravagers) | Vanguard edition
In this article we will be building a Warhammer Underworlds Khagra’s Ravagers deck that will knock the socks off your opponents in the Vanguard format. You may have heard the Khagra’s Ravagers inspire condition got easier. It’s excellent for them! For those who missed the memo, GW for once actually buffed a Warband on their official Errata. Although it is marked as optional and a BETA RULE, the expectation is most tournaments will adhere and enforce this.
I got some good news and bad news. Bad news is the Ravagers are difficult to build for on a budget for championship. They require a few Beastgrave cards to compete effectively in that arena, namely [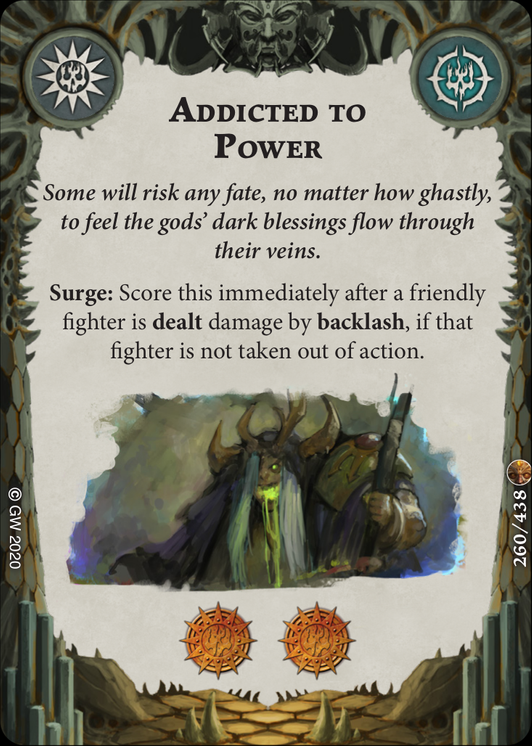 Addicted to Power].
The good news is that Khagra’s Ravagers are a strong pick for the Vanguard format, and can be easily built on a budget. For those who aren’t familiar, the Vanguard format rules are here. It’s essentially Direchasm cards and warbands only.
Why are the ravagers much better in Vanguard then they are in Championship? To answer this you need to understand how the Warband functions. The Ravagers want to place desecration tokens on the objectives. You can imagine the Chaos warriors doing a blood ritual at an objective site, or just farting on it to stink it up.

There are two main ways to desecrate objectives. Sacrifice and Despoil.
All fighters have the Sacrifice ability and it’s printed on [Khagra's fighter card]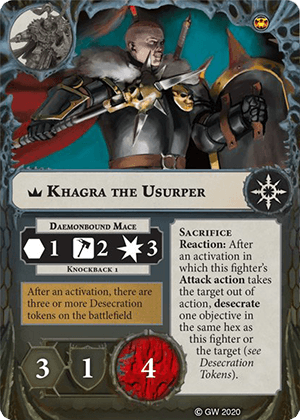 . You get to desecrate an objective if you kill a fighter on the same hex as the objective or while standing on it yourself.
Only [Razek]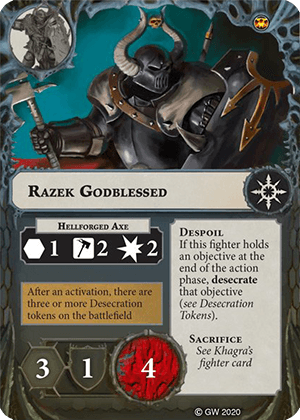 and Cragan have access to Despoil. If they stand on an Objective at the end of the action phase, you get to desecrate it for free! This gives you options to desecrate objectives even if your opponent doesn’t want to fight you.
Your opponent can also remove desecration tokens by standing on the desecrated objective – and staying on it at the end of the power step. This means if you always have the opportunity to push them off with a power card.
Back to the reason Ravagers are better in Vanguard than Championship. Without going too deep down here are a few reasons:
- In Vanguard, there’s no [
 Distraction]
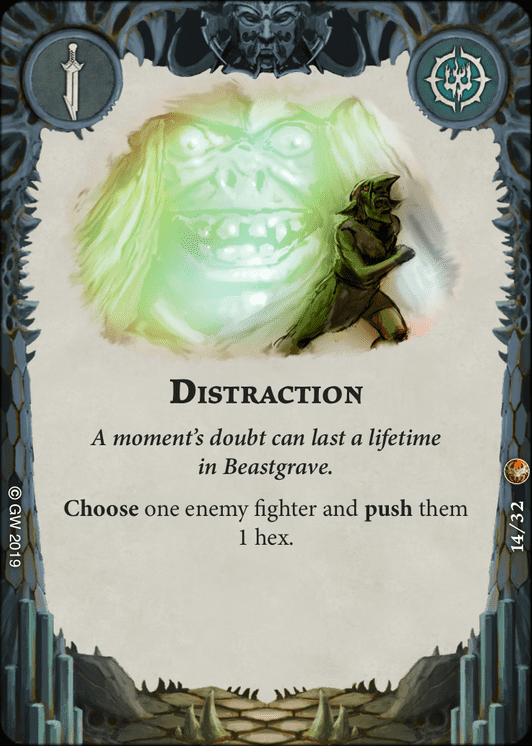 or [Mischievous spirits]
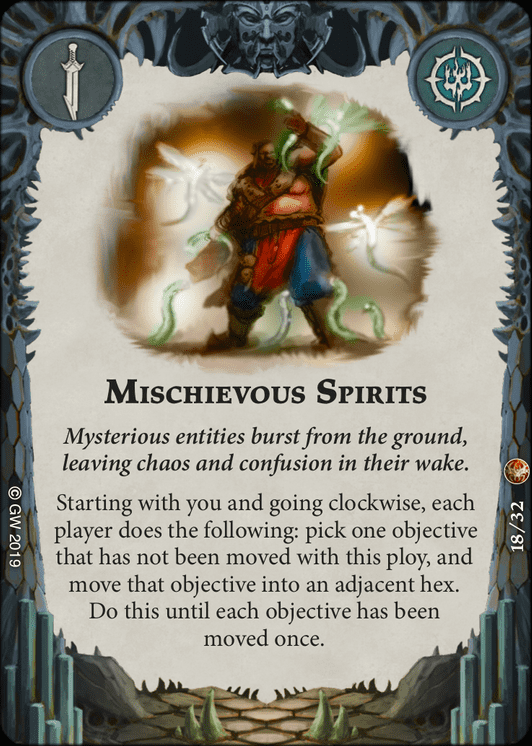 to stop you Despoiling objectives. It’s much harder to stop you desecrating.
 - In Championship, glory is scored much faster. For some well oiled warbands, they can reach 14-20+ glory on the regular, even as you murder most of their fighters. In Vanguard the pace of scoring is significantly slower. Which brings us to the next point…
- Because scoring is slower – you can pace your game and Despoil objectives. In Championship games, leaving a fighter to sit on an objective for an action phase just to desecrate it can be wasteful and may set you behind in the glory race. In Vanguard, parking [Razek] on an objective in the first round to get the extra desecrate, may not be a bad move. Your opponents wont be scoring as quickly and the extra desecrate will help you inspire.
- Fighters don’t die as quickly in Vanguard. Easy access to damage boosting cards such as [
 Great Strength]
 , [Sting of the Ur-grub]
 are not available. Even better, the Ravagers have access to their own version of Great Strength: [Ruinous Might]
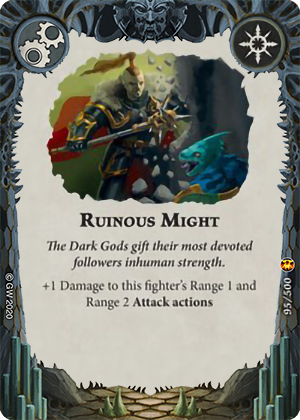 .
.
Here’s the decklist.
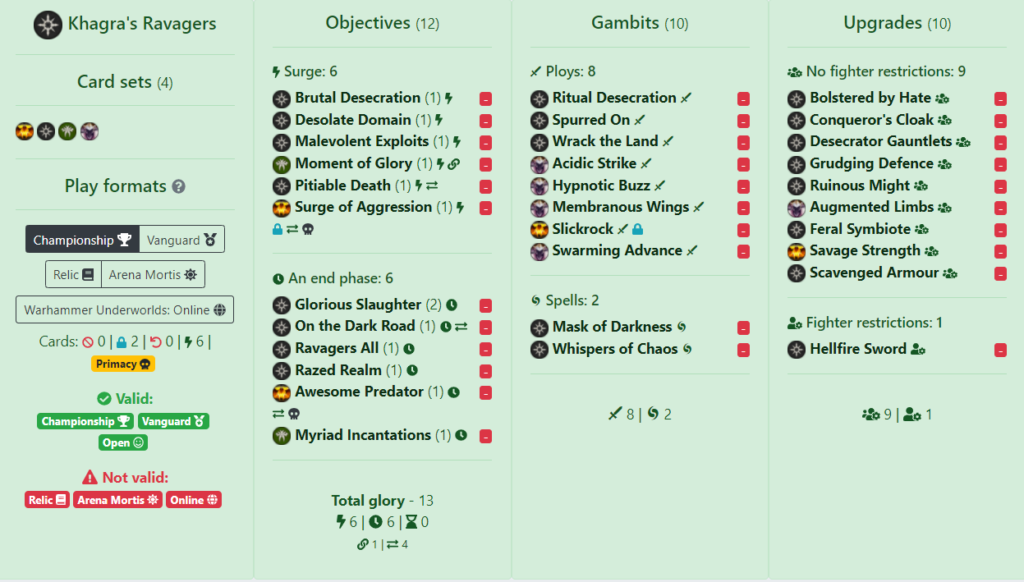
Shopping List
You’ll need the following sets to build this deck
- Khagra’s Ravagers (obviously)
- Direchasm Core set
- Hedkrakka’s Mad Mob
- Silent Menace Universal Deck
You could play this without the Silent Menace deck too and slide in a few extra Universals from the Direchasm Core set but it would be notably less powerful.
Objectives
The game plan is simple. Desecrate two objectives as fast as possible to inspire, and then start eliminating enemy fighters. You want to deploy objectives in no-mans land and skew the deployment so that there is 1 objective in your territory if possible.
- We take all the “easy” desecration objectives [
 Brutal Desecration]
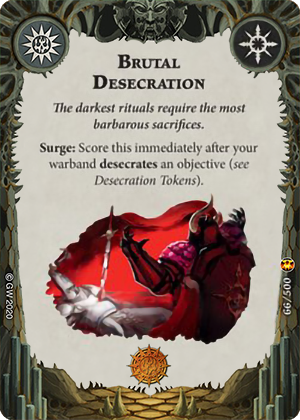 , [Desolate Domain]
 , [Razed realm]
 that reward us for desecrating 2 objectives. As a new player, you may be excused for saying Hol’ up a minute, why is [Desolate Domain] easy? It is if you place an objective or two in no-man’s land, ensuring only 1-2 objectives remain in your own territory.
 - Because inspiring is relatively easy now, [Moment of Glory]
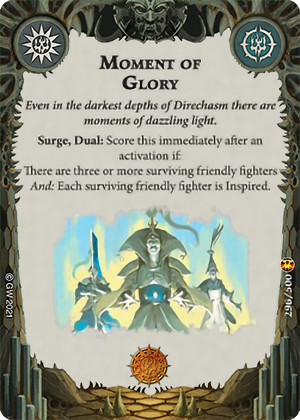 and [Ravagers All]
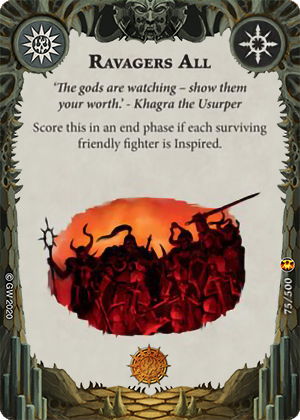 will reward us for simply doing what we want to do.
 - [Malevolent Exploits]
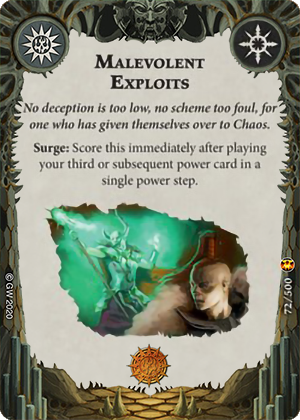 another easy to score objective. It’s 3 power cards (not 3 gambits), so it can be cashed in by playing upgrades in a single power step.
 - We take a number of standard aggro objectives that reward us for fighting. [Surge of Aggression]
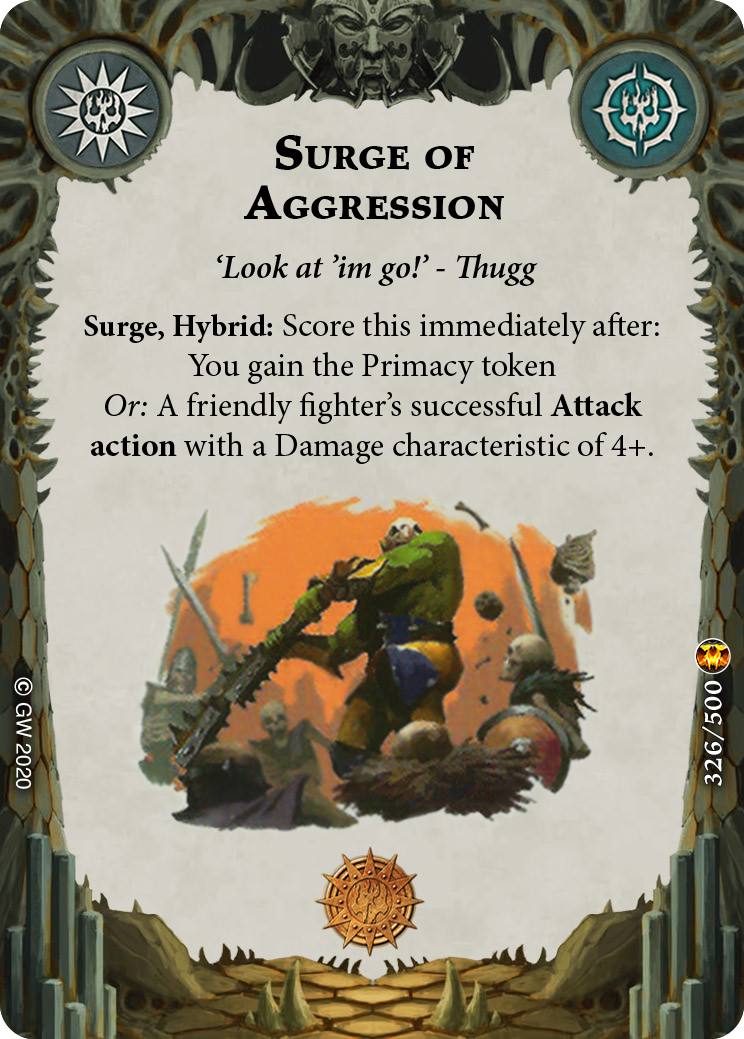 , [Awesome Predator]
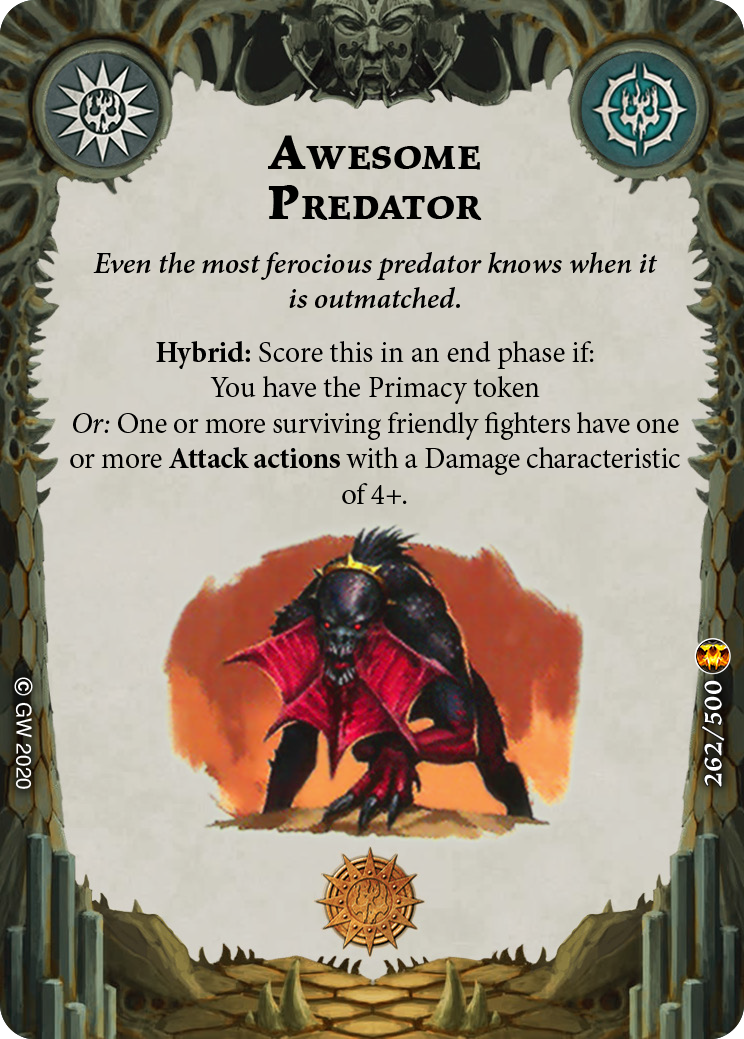 can be scored multiple ways. You can give Khagra a damage boost, knock out their leader etc. [Glorious Slaughter]
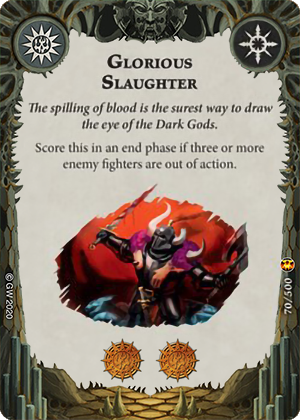 is great against Reapers or the Starblood stalkers but less effective against Crimson Court. I would switch to [Fierce Conquerers]
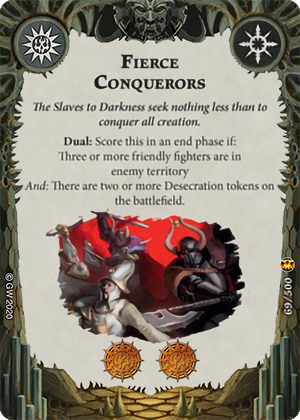 if you’re not expecting to face Seraphon or Morteks. [Pitiable Death]
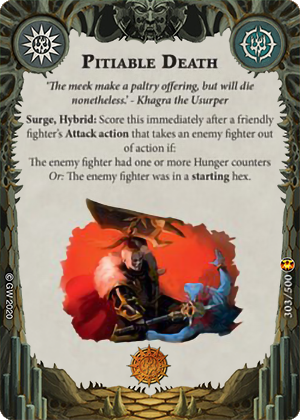 rewards us for knocking out a fighter that’s still on their starting hex, but it also can be scored by taking out someone with a hunger token, which is easily scored against Crimson Court.
 - Lastly because we don’t expect most of Direchasm’s other spellcasters to actually play gambit spells, we take [Myriad Incantations]
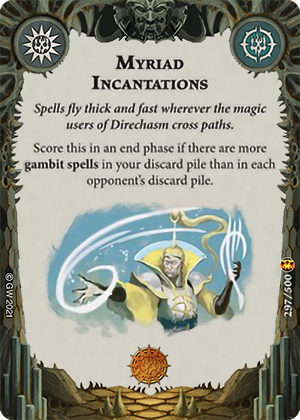 . We will be taking two gambit spells and in most games this will be a free glory for us to score. While not ideal, you can also score this by using a do-over to discard your opening hand with a spell in it.
Gambits
Gambits here are fairly straightforward. Our goals are to desecrate objectives and kill enemy fighters, so all gambits should be in service of that.
We have objectives that reward us for desecrating objectives hexes, so we take the gambits that let directly desecrate objectives (simple right?). [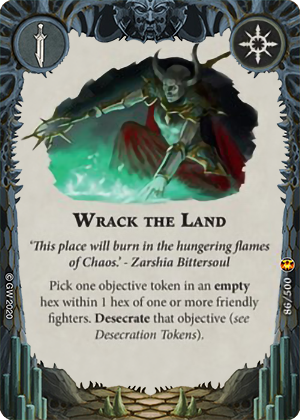 Wrack the land] and [
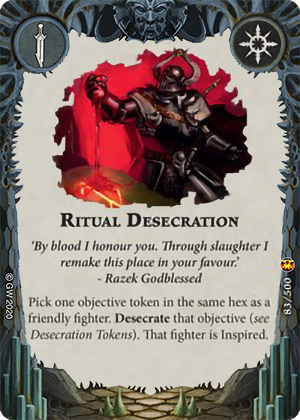 Ritual Desecration] are our friends.
[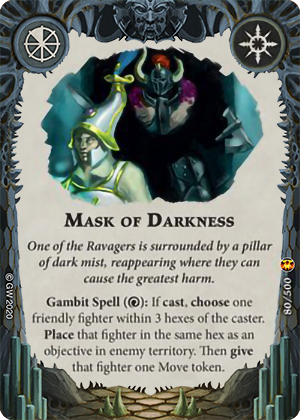 Mask of Darkness] and [
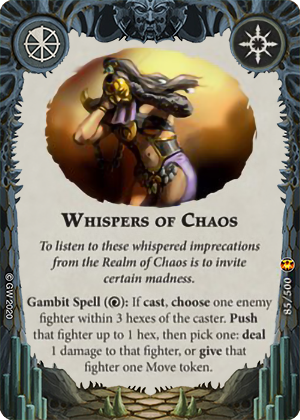 Whispers of Chaos] are two gambit spells that really push our game plan. The [Mask of Darkness] puts our fighters on objectives (which lets us Sacrifice to desecrate). [Whispers of Chaos] lets us either move enemy fighters off objectives or on objectives to set us up for a desecrate via Sacrifice.
The rest of the gambits are movement and push cards that help close the distance or set us up for a desecrate play. You can freely substitute them for whatever your favorite push cards are. [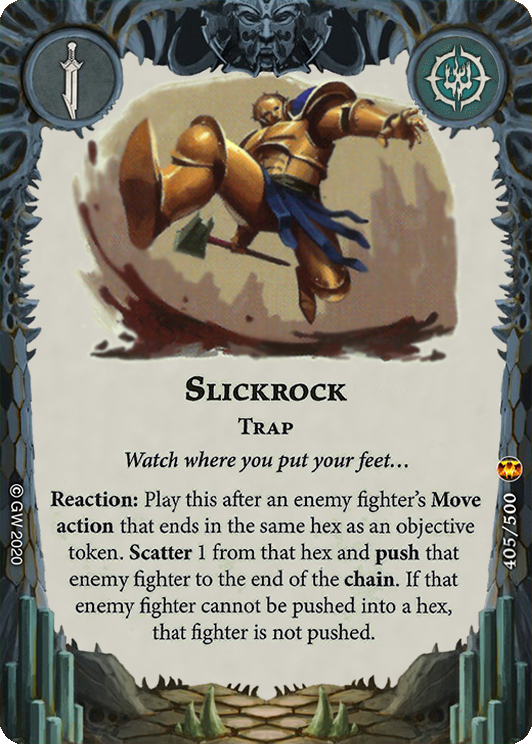 Slickrock] is included because it’s an effective way to stop your opponent from removing your desecration tokens.
Upgrades
There isn’t really much to say about most of our upgrades. Alot of them load up on extra wounds, extra damage and extra dice, which are all useful stat boosts to have. Some notes on a few of them below:
[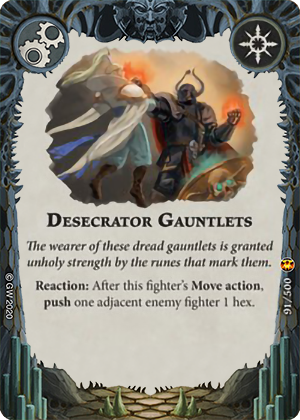 Desecrator Gauntlets] are included here. It has a fun trick where after the move action (including the move action part of a charge), you can reposition one adjacent enemy. This lets you toss people into lethal hexes or place them on objectives to Sacrifice them.
[ Savage Strength] is a solid damage upgrade. Just be weary about the -1 defence penalty. The best candidate is [Cragan]
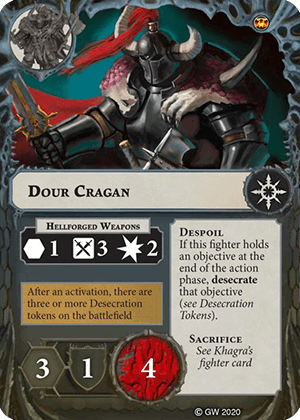 as he stays on one defense even when inspired.
[ Hellfire Sword] is one of the best ranged attack upgrades ever printed. You rarely see range 3 weapons with 2 damage. It helps you hit far away fighters and it will still trigger Sacrifice if you take them out of action.
[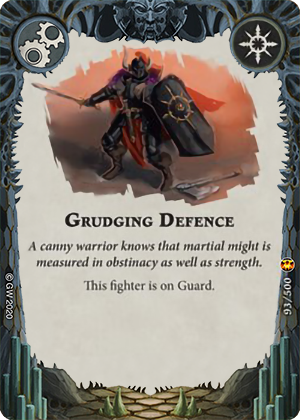 Grudging Defence] gives one of our fighters permanent guard. This is best placed on Khagra or Razek since both of them get 2 defence die when inspired. Guard keeps you ontop of objectives so your opponent has a harder time stopping you Despoiling them.
Playing the Warband
vs Hold Objective (Starblood Stalkers)
Against the Starblood stalkers (the closest thing in Direchasm to a pure hold objective warband), you want to deploy as forward as possible and kill them as quickly as possible. Target the Skinks and get the easy kills as fast as possible to start your glory train. You want to deny them the opportunity to inspire and score too much glory. The Starblood Stalkers can absolutely dunk huge glory swings if left unchecked.
If you happen to draw [Whispers of Chaos] use it to lock Klaq Trok down with a move token.
vs 4 fighter Aggro (Some Crimson Court decks, Elathain’s Soulraid, some Hedkrakka’s Madmob)
If you don’t count Spinefin, Soulraid is a 4 fighter warband. Against these warbands, you know that if you don’t come to them, they will come to you. You can deploy head on and fight them straight up, or alternatively you can try choking them with lethal hexes. You can score by sitting on objectives and desecrating them, so you can put the onus on your opponent to fight you. You can see this strategy in action in this video (although the Khagra deck is not built for Vanguard, similar concepts still apply).
vs Kainan’s Reapers
Kainan’s reapers are a different type of aggro. Against this warband you want to eliminate the Mortek first, especially before they inspire. If you can cast [Whispers of Chaos] against Kainain, you can lock the big guy down with a move token. You can also use it to eliminate a Mortek by pushing them into a lethal and dealing 1 damage.
Once you’ve eliminated as many Mortek as possible, you can eliminate Kainan if you have the resources and upgrades to do so, otherwise run away and try to despoil some objectives. Fortunately Kainan does not have cleave and will have a hard time hitting inspired Khagra and Razek. Keep in mind if you do manage to take out Kainan, he is worth 2 glory points due to having 6 wounds.
vs Flex (Myari’s Purifiers and Dread Pageant)
This is probably the tougher matchup for the Ravagers. Both warbands will play well no matter how the board is setup and they are both comfortable fighting you, sitting back on objectives or doing both at once.
Against Myari’s Purifiers, be careful about getting stuck fighting Bahannar. He’s deceptively hard to kill and his ability makes it difficult to drive him into lethal hexes. If possible, aim to eliminate the other fighters first if you get the chance. Khagra herself is your main threat as her starting 3 damage allows her to take out any elf she manages to hit.
Against Dread Pageant, [Glisette]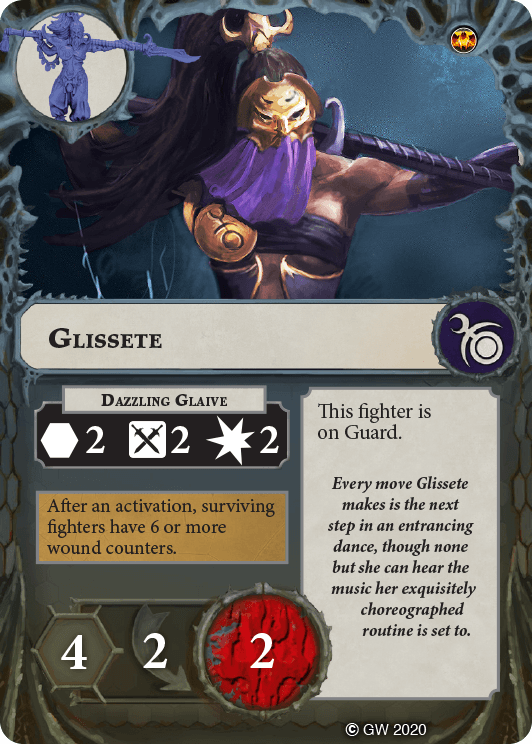 looks easy to kill but you will find it difficult to land hits on her. You want to try to get the two desecrates down for an inspire before you fight them head on. Your inspired 2 Shield fighters [Khagra]
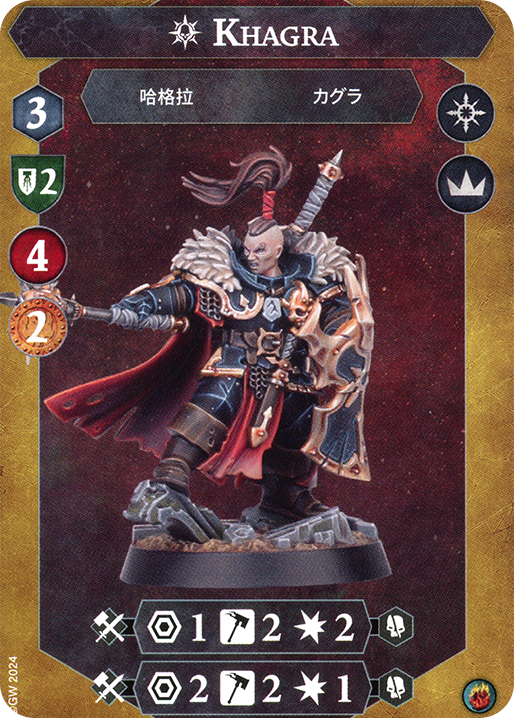 and Razek are hard for them to stick wounds on. Cragan Inspired also gains cleave, which becomes useful when trying to eliminate Glisette.
vs Defensive / Control (Hunger Crimson Court, Defensive Hedkrakka’s)
If you do come across one of these specimens in Vanguard, the trick is only fight them after you inspire. These decks typically sit as far back as possible to avoid fighting you early. They power up and drop big glory bombs in the later rounds.
You do want to fight them and ruin their plans, but because they often give up territory and space to do so, you can take the first round to freely desecrate some objectives. Use your fighters despoil ability and combine with a gambit or two and you can inspire at the end of round 1. This will set yourself up for an advantageous fight in round 2 and 3.
Deployment
Objective deployment is important for Khagra’s ravagers, but you generally never need to place your board first to have 3 objectives to place. If you win the initial roll off, it is almost always better to place the board second and get the close board you want.
Here’s a sample deployment. The blue objectives are placed by the Ravagers player, while the orange ones are placed by your opponent who in this case we will assume to be the Starblood Stalkers.
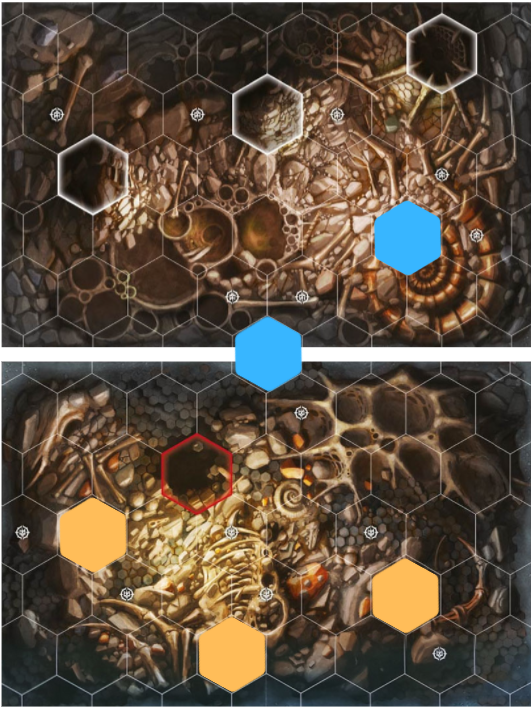
Why do we place one objective in no-mans land? For two reasons
- [Desolate Domain]. This can be scored immediately after desecrating the single objective in our territory.
- It’s another easily accessible objective that we can desecrate if our opponent fights us for it. It’s also really close to their frontal starting hex so if they deploy there we can set up a Sacrifice.
In most cases we want to place one of our objectives in no-mans land to set up an easy[Desolate Domain]. If our opponent sets up objectives on our territory, we can always put the other objective in theirs.
While not specific to Khagra’s Ravagers, you can also check out Benji’s general deployment guide on Tabletop Sydney. Objective deployment is quite important for the Ravagers and learning good placement will go a long way to helping you win more games.
Upgrading to Championship format
So you read all this but all you want to do is just play Championship format? While it can be done, it will not be as easy to do so on a budget. I’ve included some ideas below but in general you want to add [Addicted to Power] and change some of your push cards.
Why [Addicted to Power]? You score this by suffering backlash and living through it. If you read [Zarshia's card]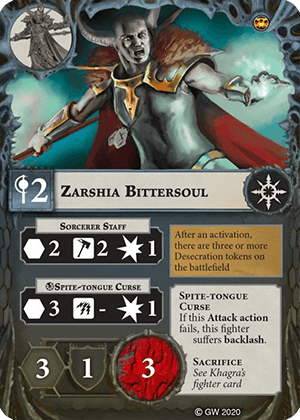 , she suffers backlash every time she fails an attack. Ever wished you could score 2 glory for rolling badly? This is your opportunity.
[Distraction] is the go to push card. It helps you move enemies on or off objectives to set up desecration plays. Other push cards like [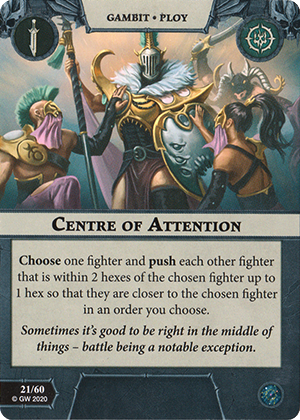 Centre of Attention] are suitable upgrades to your existing set of cards.
[Great Strength] should replace [Savage Strength] as it does not have the defence penalty. [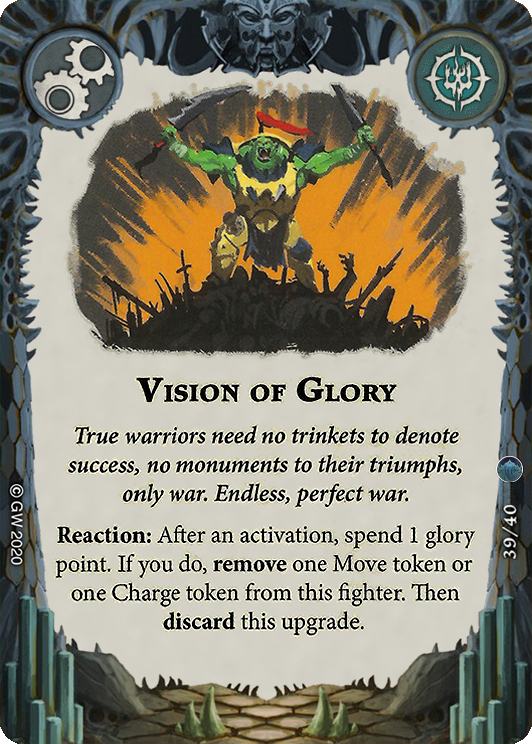 Vision of Glory] from the first Arena Mortis is a handy upgrade to include as it gives you the chance to charge twice and potentially desecrate objectives deeper into enemy territory.
I hope this article has been good to you. Now go out there and please the Chaos Gods.